PINHOLE PHOTOGRAPHY
|
What is pinhole photography?
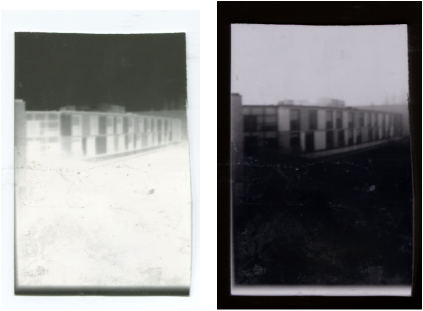
A pinhole camera is a simple camera without a lens and with a single small aperture – effectively a light-proof box with a small hole in one side. Light from a scene passes through this single point and projects an inverted image on the opposite side of the box. on the other side of the box there will be photographic paper taped to the side to stop it form moving. Pinhole photography is a photo taken by a simple camera that can be easily made. there is no lens to the camera juts a small pin sized hole. A pinhole camera can be easily made out of old gravy tins coke cans and much more. You just need an old container that you can make light tight that means so no light can get through. The photo taken with the pinhole camera will be unique and if you take the same photo with a digital camera it will look very different. It will different because the photo taken with the pinhole camera will have a more grainy effect where as the photo take on the digital camera it would look more smooth. Up to a certain point the smaller the hole the sharper the image but the dimmer the projected image. |
History of pinhole photography
In the 5th century B.C, Chinese scholars had discovered that light travels in straight lines . The philosopher Mo Ti recorded that the light formation of an inverted image with a pinhole. Mo Ti was aware that objects reflect light in all directions, and that rays form the top of the object, when passing through a hole, will produce the lower part of the image. there is no further references to the camera obscura in Chinese texts until the 9 century AD when Tuan Chheng Shih refers to an image in a pagoda. Shen Kua later corrected his explanation of the image. Yu Chao-Lung in the 10 century used a model pagodas to make pinhole images on a screen however, no geometric theory on image formation resulted from these experiments and observations. In the following centuries the pinhole technique was used by optical scientists in various experiments to study sunlight projected form a small aperture
In the 5th century B.C, Chinese scholars had discovered that light travels in straight lines . The philosopher Mo Ti recorded that the light formation of an inverted image with a pinhole. Mo Ti was aware that objects reflect light in all directions, and that rays form the top of the object, when passing through a hole, will produce the lower part of the image. there is no further references to the camera obscura in Chinese texts until the 9 century AD when Tuan Chheng Shih refers to an image in a pagoda. Shen Kua later corrected his explanation of the image. Yu Chao-Lung in the 10 century used a model pagodas to make pinhole images on a screen however, no geometric theory on image formation resulted from these experiments and observations. In the following centuries the pinhole technique was used by optical scientists in various experiments to study sunlight projected form a small aperture
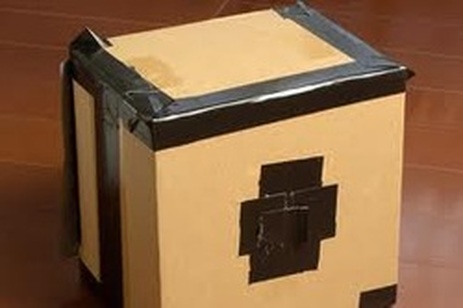
How a pinhole camera is made
Step by step on how to make a pinhole camera
Things you will need:
Step 2: Mark out a small rectangular shape 3/4 inches form the bottom, so that when your done you can place the photographic paper inside
Step 3: Cut out the rectangular shape using a scalpel but make sure that you only cut 3 sides you want to leave some side not cut so you can make a flap. so you want to leave the left side not cut
Step 4: Cut a piece of foil that is slightly larger than the rectangular flap
Step 5: Cut out four small pieces of black duct tape and stick the foil inside the tin making sure that it covers the flap
Step 6: Pierce a very small hole in the middle of the foil with a pin
Step 7: Cut a larger piece of black duct tape stick it over the closed flap on the outside making sure that it is closed properly. Fold back a little of the take on the right side so it makes it easier to pull back
Step 8: Spray paint the inside of the tin making sire that everything is covered even spray the lid
Step 9: If the lid doesn't close properly stick it down with some black duct tape
Step 10: Put some photographic paper inside the tin. When doing this step make sure that you do this in the dark room. If you don't the paper would be exposed to light making it non usable
Now your pinhole camera is ready to use!
Step by step on how to make a pinhole camera
Things you will need:
- Light tight container with a removable lid eg: gravy tin, hot chocolate tin biscuit tin ect
- Black duct tape
- Scalpel
- Foil
- Black paint/Black spray paint
- Pin
- Scissors
Step 2: Mark out a small rectangular shape 3/4 inches form the bottom, so that when your done you can place the photographic paper inside
Step 3: Cut out the rectangular shape using a scalpel but make sure that you only cut 3 sides you want to leave some side not cut so you can make a flap. so you want to leave the left side not cut
Step 4: Cut a piece of foil that is slightly larger than the rectangular flap
Step 5: Cut out four small pieces of black duct tape and stick the foil inside the tin making sure that it covers the flap
Step 6: Pierce a very small hole in the middle of the foil with a pin
Step 7: Cut a larger piece of black duct tape stick it over the closed flap on the outside making sure that it is closed properly. Fold back a little of the take on the right side so it makes it easier to pull back
Step 8: Spray paint the inside of the tin making sire that everything is covered even spray the lid
Step 9: If the lid doesn't close properly stick it down with some black duct tape
Step 10: Put some photographic paper inside the tin. When doing this step make sure that you do this in the dark room. If you don't the paper would be exposed to light making it non usable
Now your pinhole camera is ready to use!
Nancy Breslin
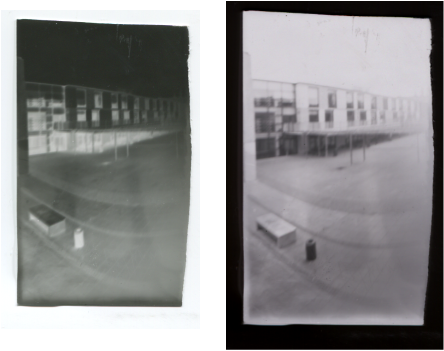
Nancy Breslin is a Delaware and Washington, DC based photographer who specializes in black and white images of amusement parks and in photographs taken with pinhole and plastic cameras. for some projects she works will alternative photographic processes or sometimes in video. Nancy Breslin's photography has been seen in over 60 group shows, including exhibits at the Delaware Centre for Contemporary Art, the Delaware Art Museum, She has had solo shows at the Mezzanine Gallery, Agilent Technologies Corporate Headquarters, Colour works and the Grand Opera House (Wilmington, Delaware); the Arlington Arts Centre (Arlington, Virginia); the Saint Joseph's University Gallery (Philadelphia) and much more.Her work has also been published in books.
This photo was taken in Dinner in Newark, DE , with a one minute pinhole exposure.
|
Steven Pippin
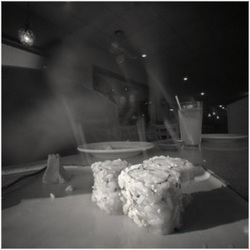
Steven Pippin is an English photographer who shows a strong interest in the mechanical side of photography. Pippin's early Pippin's early work was based on converting furniture and everyday objects into makeshift pinhole cameras. He then uses these pinhole cameras to take sympathetic photographs. He often has to plan and construct a significant amount of equipment in order to achieve his photographs. He has to to a significant amount of planning to overcome the practical problems posed by the chosen object. |
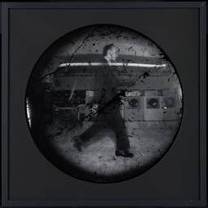
This is one of my favorite pinhole photographs made by Steven Pippin. in this photo hes in the laundrettes like most of his other photography. he placed his pinhole camera inside the washing machine. he made a trip wire to set off the cameras.
|
Annotation of Image

In this image the focus is mainly on the tree trunk. The rest of the image is very blurry. The tones used in this photo is very good because it uses all three black grey and white. I think that this image has been exposed for the right amount if time, not overexposed and not underexposed. the contrast in this image is very good because it starts of very black at the edges then fading into a lighter colour, grey, then the grey fading into a white. I think that this images texture is smooth, it doesn't look grainy or rough. the composition in this image is good because the tree is placed in the middle of the image making it the center of attention, even though the background has nothing in it. the tree is standing on its own in the middle of no where it gives a spooky effect to the image. the depth of field is on the tree trunk whereas the rest of the tree is blurred.